
Table of Contents
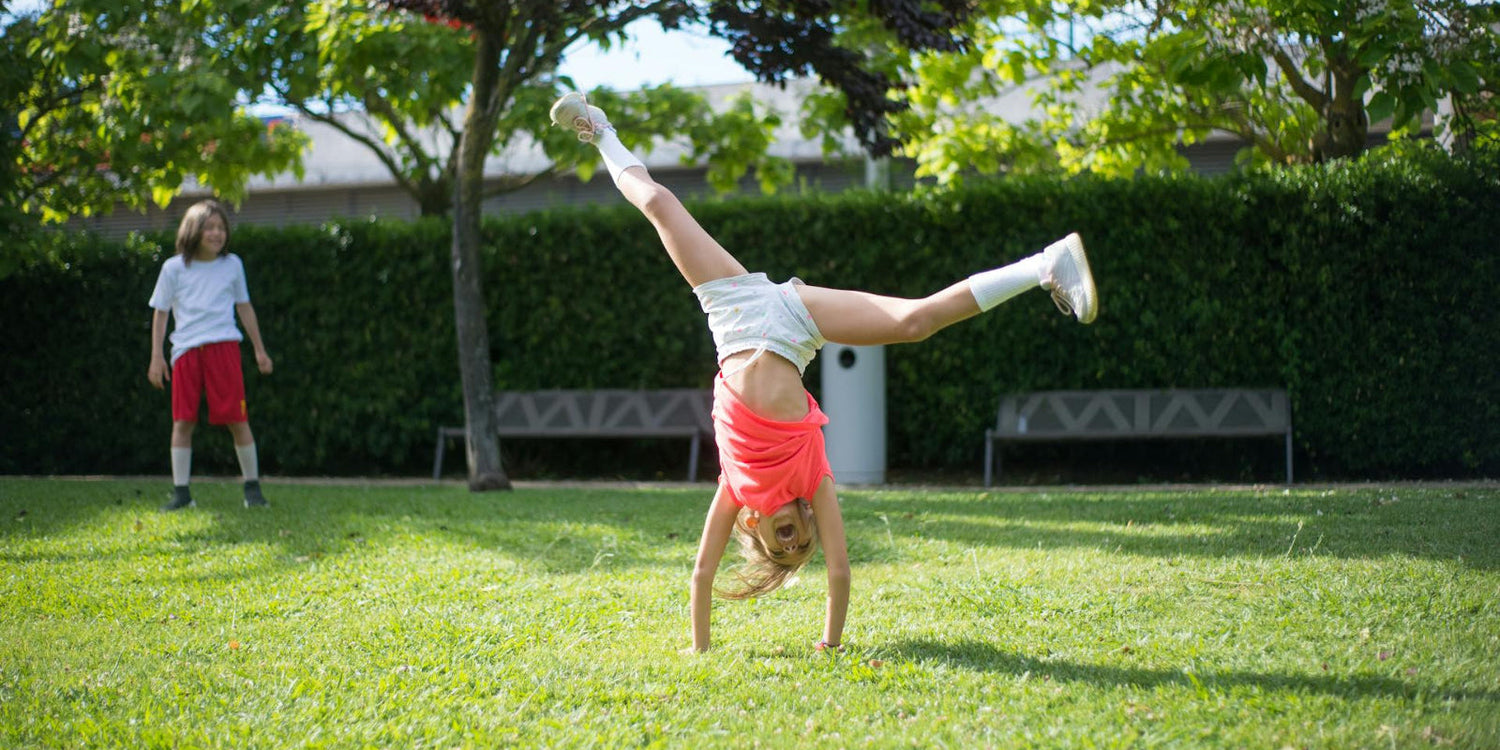
A cartwheel is a classic acrobatic movement where the body rotates sideways, transferring weight from the feet to the hands and back to the feet again, resembling the turning spokes of a wheel. Learning how to do a cartwheel is more than just a fun party trick; it is an excellent way to improve physical coordination, build upper body strength, and boost body awareness.
Whether you are a complete beginner, a parent guiding a child, or an adult wanting to regain some agility without any gymnastics background, this guide is designed to help you master the basics safely and effectively.
This tutorial is written from a beginner coaching perspective and focuses on simple cues you can test immediately, not perfection on day one.
Key Takeaways
- A cartwheel is a sideways hand hand foot foot pattern that builds coordination, shoulder stability, and body awareness fast.
- Start on a soft, open surface, warm up wrists and hips, and stop for sharp pain, numbness, or dizziness.
- Use a strong lunge, straight arms, and a big leg V to create lift and clean one foot at a time landings.
- Drills like line tape, donkey kicks, and low cartwheels remove fear and lock in alignment before full reps.
- Level up only after consistent control, then chase straighter legs, cleaner lines, and optional one hand progressions.
Safety First
Before attempting any new skill, ensuring a safe environment is the top priority. Choose a practice surface that is soft and forgiving, such as a grassy area, a gym mat, or a carpeted room with plenty of open space. Avoid hard surfaces like concrete or slippery tiles.
Wear comfortable clothing that allows for a full range of motion. Going barefoot is often best for beginners to feel the ground and prevent slipping, though thin-soled, grippy athletic shoes can be used on grass. Always warm up before starting, and never practice if you are experiencing dizziness, sharp pain, or recovering from an injury. For young children, having a spotter or adult supervision is highly recommended.
Basic Body Awareness & Prerequisites
You do not need to be extremely flexible or strong to start learning a cartwheel. A few simple checks can determine if you are ready:
- Can you hold a basic lunge position with stability?
- Can you reach your arms straight up by your ears?
- Can you support your weight on your hands briefly, such as in a small sideways hand support or plank?
Rest assured, you do not need to be able to do the splits or a handstand to begin. Basic stability and the ability to bear weight on your arms are the primary requirements.
Understanding the Cartwheel Motion
Think of a cartwheel as moving your body in a sideways wheel from one foot to the other. The motion follows a distinct rhythm: hand, hand, foot, foot. It is crucial to understand that this is a sideways movement, distinct from a forward roll or a front flip. The key phases involve a strong starting stance, a deep lunge, sequential hand placement, a leg kick that passes through an upside-down V shape, and a controlled landing. Your goal is not height at first. Your goal is clean order, straight arms, and a straight travel line.
Warm-Up for Cartwheels
Preparing your body is essential to prevent injury and improve performance.
- Light Cardio: Spend 3–5 minutes jogging in place or doing jumping jacks to raise your body temperature.
- Dynamic Stretches: Perform arm circles, side lunges, and hip circles to mobilize your joints. Gentle hamstring and calf stretches will help with the leg kick.
- Wrist Prep: Since your wrists will support your body weight, perform wrist circles and gentle palm stretches (placing palms on the floor and leaning forward/back) to ready them for impact.Aim for warm wrists, not forced stretches. If wrists feel tender, shorten the lean and reduce total reps.
Step-by-Step Cartwheel Technique for Beginners
Step 1: Find Your Dominant Side
Determine which leg you naturally step forward with or which hand you instinctively use to catch a ball. If you lead with your right leg, you will typically cartwheel toward the right side. Choose one side to start with and stay consistent. If you are unsure, try two slow walk through attempts on each side and choose the side that feels more balanced.
Step 2: Starting Position
Stand tall with your feet hip-width apart. Extend your arms straight up by your ears and keep your eyes facing forward. Think ribs down, glutes lightly tight, and shoulders reaching tall.
Step 3: The Lunge Entry Position
Step forward with your dominant leg into a lunge. Bend your front knee slightly while keeping the back leg straight. Keep your arms by your ears and lean your body slightly over the front leg, creating a straight line from your fingers to your back heel. Hold this for one second so your body learns the shape before you move.
Step 4: Hand Placement
Turn your body sideways. Place your first hand on the ground in front of your front foot. Almost immediately, place your second hand on the ground in line with the first, about shoulder-width apart. Your fingers should face roughly the same direction you are traveling. Use a simple target: first hand lands just past the front foot, second hand lands one shoulder width ahead on the same straight line. Push the floor away with straight elbows to protect your head and build stability.
Step 5: Leg Kick and Upside-Down Phase
As your hands touch the ground, kick your back leg up strongly. Allow the front leg to push off the floor and follow. Your legs should pass over your body in a wide straddle or V shape. Focus on keeping your arms straight, core tight, and eyes looking at the ground between your hands. Make the V bigger than you think. A bigger V helps you land one foot at a time instead of collapsing into feet together. If you feel stuck, kick the back leg higher first, then let the second leg chase it.
Step 6: Landing and Finish
Land one foot at a time. The first foot to land will be the leg that kicked up first. As you land, lift your hands off the ground. Finish in a lunge facing the opposite direction from where you started. Stand up tall with arms by your ears to complete the move. Freeze the finish for one second. If you cannot freeze, the rep was too fast or too tired.
Beginner Progressions and Drills
Confidence and Balance Drills
If going upside down feels intimidating, start with sideways weight shifts. Place your hands on the floor and hop your feet side-to-side without lifting them high. You can also try donkey kicks to get used to supporting weight on your hands. For donkey kicks, keep knees slightly bent and aim for quiet landings to protect wrists and shoulders.
Partial Cartwheels
Practice a small, low cartwheel with bent legs. Focus on the correct hand order hand hand and foot landing foot foot without worrying about getting your legs vertical. Gradually increase the height of your kick as you gain confidence. A good rule is low and clean before high and messy.
Line or Tape Drills
Use a line on the floor or a strip of tape to guide your alignment. Practice placing your hands and landing your feet along the line to ensure you are traveling straight rather than curving. Mark four spots on the line for hand hand foot foot so your body learns straight travel.
Common Mistakes and How to Fix Them
- Bending Arms: This reduces stability and risks head injury. Fix: Focus on "pushing the floor away" and locking your elbows.
- Not Kicking High Enough: This stops momentum. Fix: Practice aggressive leg swings and donkey kicks to build power.
- Turning Forward: This turns the move into a round-off or messy roll. Fix: constantly remind yourself to move like a "sideways wheel" and keep your chest open.
- Landing with Feet Together: Fix: Exaggerate the "big V" shape with your legs in the air to ensure a one-foot-at-a-time landing.
- Looking Around: Fix: Pick a specific spot on the floor between your hands and keep your eyes glued to it.
Safety Tips and Injury Prevention
Always listen to your body. If you feel sharp pain in your wrists, shoulders, or back, stop immediately. Beginners should limit the number of repetitions to avoid fatigue-related accidents. After practicing, cool down with gentle stretching for the wrists, shoulders, and hamstrings. Avoid grinding through sloppy reps. Fatigue makes hand placement late and landings heavy. If a child is practicing, keep the space clear, use a mat, and supervise every attempt.
Practice Plan for Beginners
Consistency is key to learning a cartwheel. A recommended weekly routine includes:
- 2–3 sessions per week.
- 5–10 minutes of warm-up.
- 10–15 minutes of drills and partial cartwheels.
- 3–5 attempts at a full cartwheel once you feel ready.
Filming your practice can be a great way to self-correct and track your progress.
When & How to Level Up
You are ready to advance when you can perform a straight-arm cartwheel with good control and balance consistently. Next steps might include working on straightening your legs completely, landing on a strict line, or exploring one-handed cartwheels. Remember, slow and steady progress is safer and more effective than rushing. Progress one variable at a time, either straighter legs or a cleaner line, not both in the same session.
FAQs
What physical requirements do beginners need to learn a cartwheel?
You only need basic stability and the ability to bear weight on your arms. Flexibility like the splits or holding a handstand is not required. You can test your readiness by holding a stable lunge and supporting your weight in a small sideways plank. These simple checks ensure safe practice.
Why do my wrists hurt when I practice learning a cartwheel?
Your wrists hurt because they are supporting your entire body weight without a proper warm-up. You must perform wrist circles and gentle palm stretches before attempting the movement. Shorten your lean and reduce total repetitions if your wrists feel tender. Stopping for sharp pain prevents serious injuries over time.
How can beginners overcome the fear of going upside down in a cartwheel?
You can overcome fear by starting with small sideways weight shifts instead of a full inversion. Placing your hands on the floor and hopping your feet side to side builds confidence safely. Practicing partial cartwheels with bent legs helps your body learn the hand and foot order without height.
Why do my feet land together when doing a cartwheel?
Your feet land together because you are not keeping your legs in a wide straddle during the upside-down phase. You must exaggerate a big V shape with your legs in the air to ensure a staggered landing. Kicking your back leg higher helps the second leg follow properly.
What should I do if my cartwheel turns forward instead of sideways?
You must use a straight floor line to guide your hand placement and keep your chest open. Turning forward happens when you lose the sideways wheel motion. Practicing on a strip of tape forces your hands and feet to land in the correct sequence without curving your body.
Conclusion
Learning how to do a cartwheel takes patience and practice. It is completely normal to feel awkward at first, but with time, your form will improve. Remember to warm up properly, follow the steps, and prioritize good form over speed. Keep practicing, stay safe, and enjoy the fun of learning a new skill. If you can keep the order hand hand foot foot, stay on a straight line, and finish balanced, you are already doing a real cartwheel.


Leave a comment
This site is protected by hCaptcha and the hCaptcha Privacy Policy and Terms of Service apply.